
|
|

|
|
|
|
Welcome to the Australian Ford Forums forum. You are currently viewing our boards as a guest which gives you limited access to view most discussions and inserts advertising. By joining our free community you will have access to post topics, communicate privately with other members, respond to polls, upload content and access many other special features without post based advertising banners. Registration is simple and absolutely free so please, join our community today! If you have any problems with the registration process or your account login, please contact us. Please Note: All new registrations go through a manual approval queue to keep spammers out. This is checked twice each day so there will be a delay before your registration is activated. |
|
|||||||
|
|
Thread Tools | Display Modes |
 26-01-2008, 04:46 PM
|
#1 | ||
|
FTF Club Moderator

Join Date: Jan 2005
Location: Driving my Tickford T3 Wagon in Sydney
Posts: 3,132
|
This is a post to warn people about rust on their AU's. We know that cars made of steel will rust. Most of us want to preserve our cars for a long time so its important to do the little things to make our cars last. Unfortunately our cars are not brand new covered by a paint and corrosion warranty any more.
On Thursday I decided to detail the car and inside the doors. I thought I should take the rubbers off the car as it would make the job a lot easier. In doing so I found some nasty rust. Under the rubber that goes from the bottom of the rear door up along the roof line down to the bonnet there is a join of two pieces of sheet metal that has been spot welded. Where the two pieces of metal meet there is no paint between them and being having moisture under the rubber trapped has caused the rust. Here is some photos of the rust I found. 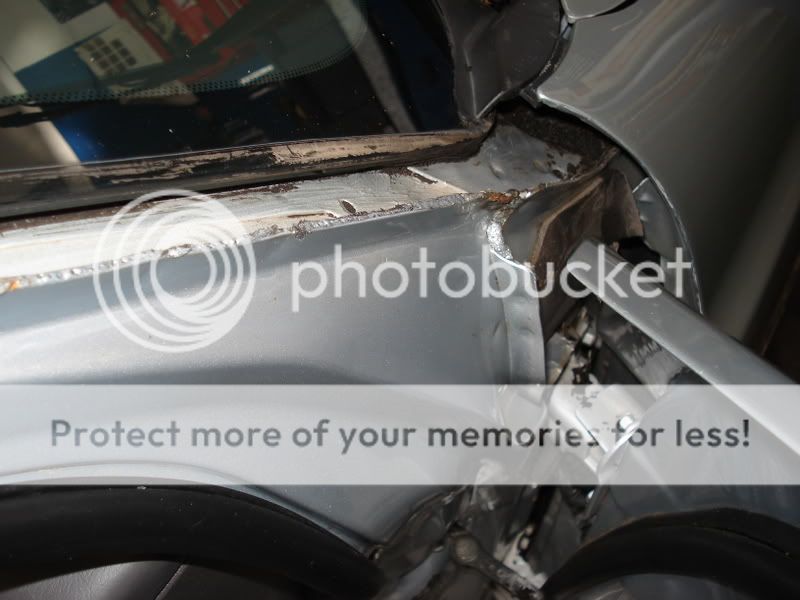 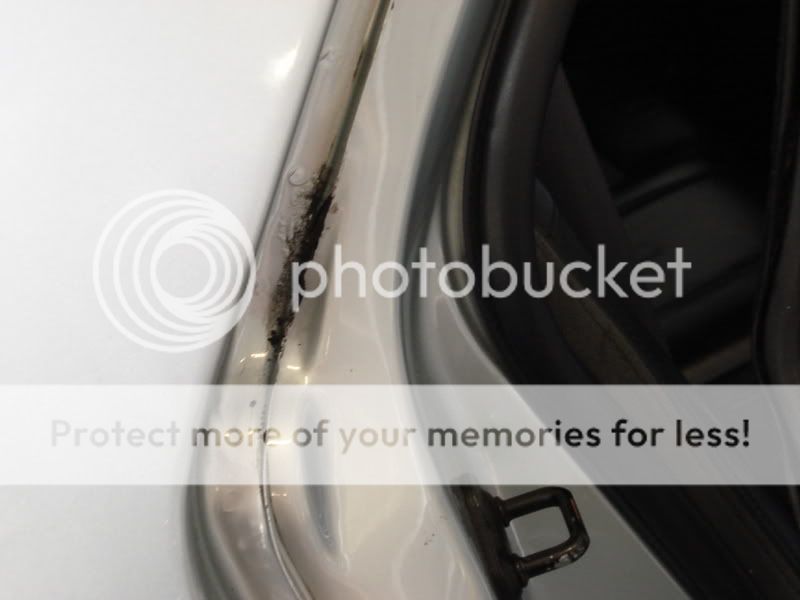  I have written a how to on taking the door surround rubbers, door rubbers and the windscreen cowling off. First we are going to take the door rubbers off. Weather it be a wagon, ute or sedan the method is still the same. I did this on the 4 post hoist at work as it makes it easier when working a chest height. How to remove the door rubber. 1. Open door. 2. This is the rubber we are going to remove. 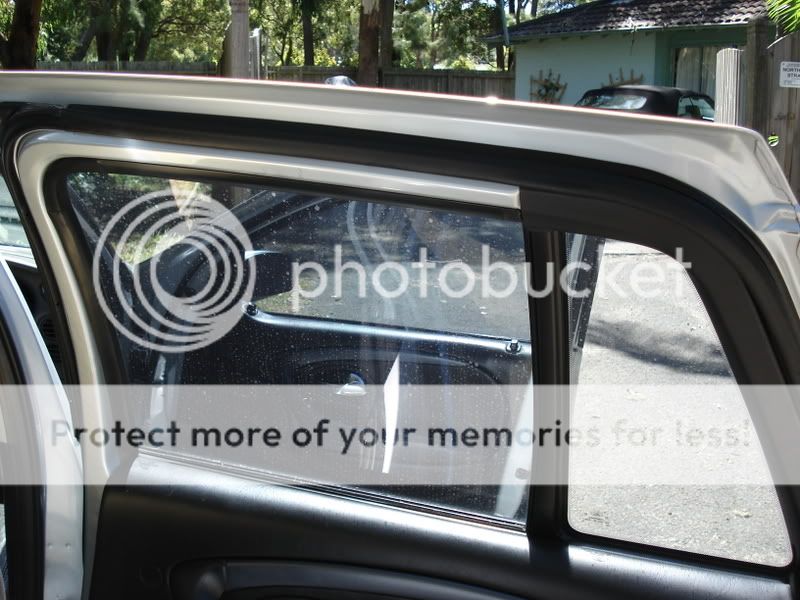 3. To remove the rubber from the top it lifts strait off. It is held on securely but it just squeezes on and off. 4. To remove the bottom half of the rubber, there are clips in the door in the shape of a T. The rubber on the back side has tiny holes in it spaced between 5 to 10cm. The rubber holes are placed on the T. Grab the rubber and pull in one direction along the rubber, then while stretched, pull away from the door. This will stretch the hole and remove it from one end of the T. The other end just slips right off then. Do this repeatedly to remove the rubber Here you can see all the T clips. You can see there is a few of them, only on the bottom of the doors. 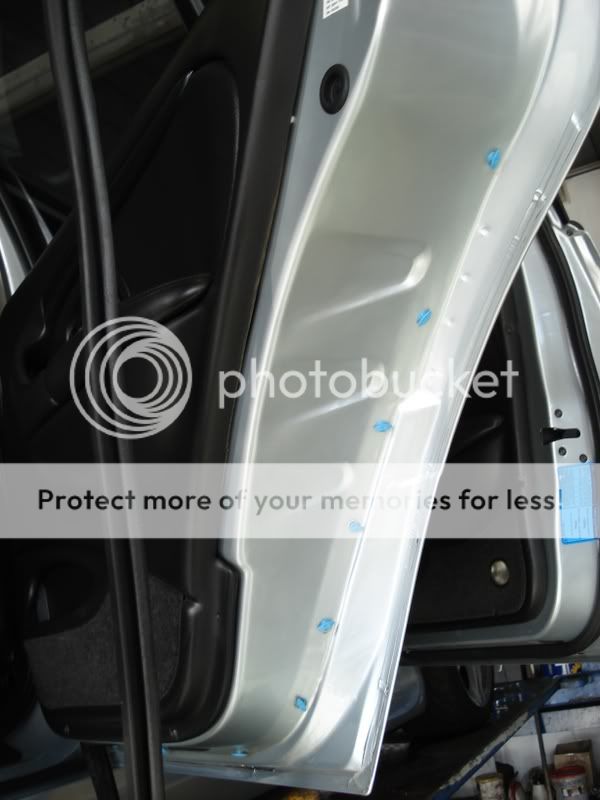 This is the T holding the rubber on. 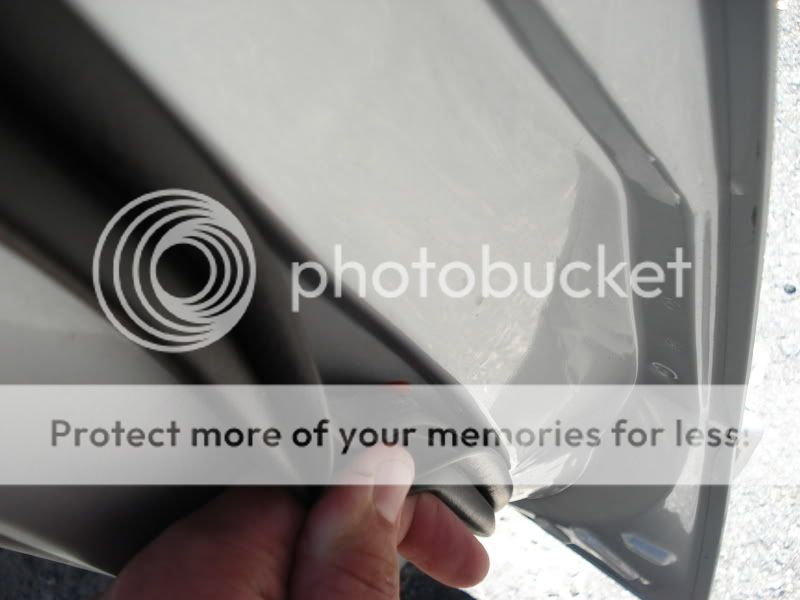 5. With the rubber off clean any dirt and moisture away. 6. I would recommend adding a coat of wax under the rubber, to help prevent water penetration. 7. To install the rubber, put a hole over the T and pull the rubber to stretch the rubber, so the hole increase in size and place over the other side of the T. 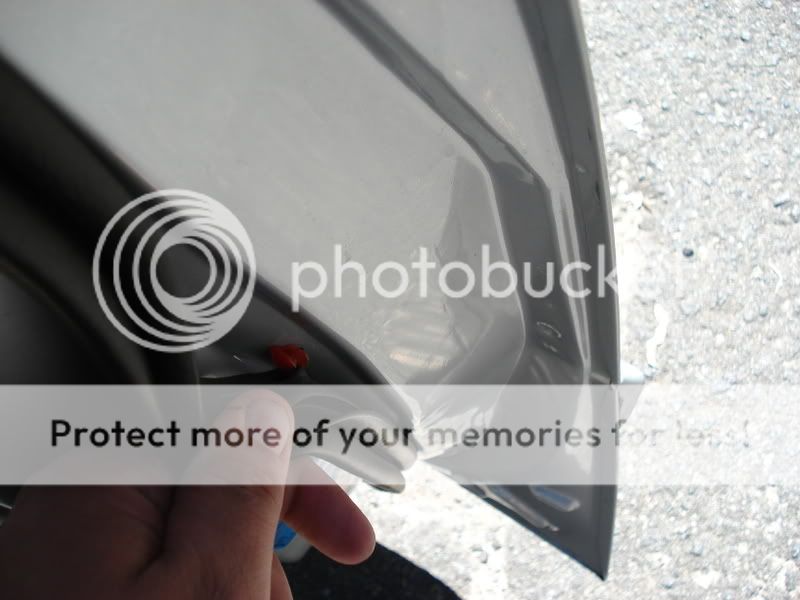 8. Top half slides right back on. 9. Check to see if it is sealed properly by going for a drive and listening for noise. How to remove the door surround rubber. Next is the long rubber. This rubber has no clips like the doors do. The rubber slides over the two pieces of sheet metal. 1. The best way to tackle this long rubber is start from one end and work your way to the other end. Easiest place to start is the rear door. This will be different for our 2 door friends but the principal is still the same. 2. There is a part of the long rubber at the top of the rear door that is held on by a channel in the door surround and the rubber sitting in this channel. 3. Slowly take the rubber off. The best way I found was to only take half the rubber off. Clean away any dirt and moisture. Wax the area. Reinstall the rubber, then do the front half. It just made it easier to handle and reinstall the rubber. 4. Reinstalling the rubber is easy. It just slides back into place. The front at the a pillar is a little challenging but is falls back into place. Under this rubber is where I found my rust. 5. If there is no rust, just clean and wax and away you go. If there is, its best remove it. What action to take will depend on the severity of the rust. How to remove the windscreen cowling. 1. To remove the cowling the wipers need to come off. At the base of the wiper are is a plastic cover. There is a little notch there to help lift the cover off. 2. There is a single 12mm nut and washer. Before you undo it. Mark on the windscreen with some tape where the wiper sits when the wipers are turned off. Reason being is that the bolt that holds the wiper on is a splined bolt. 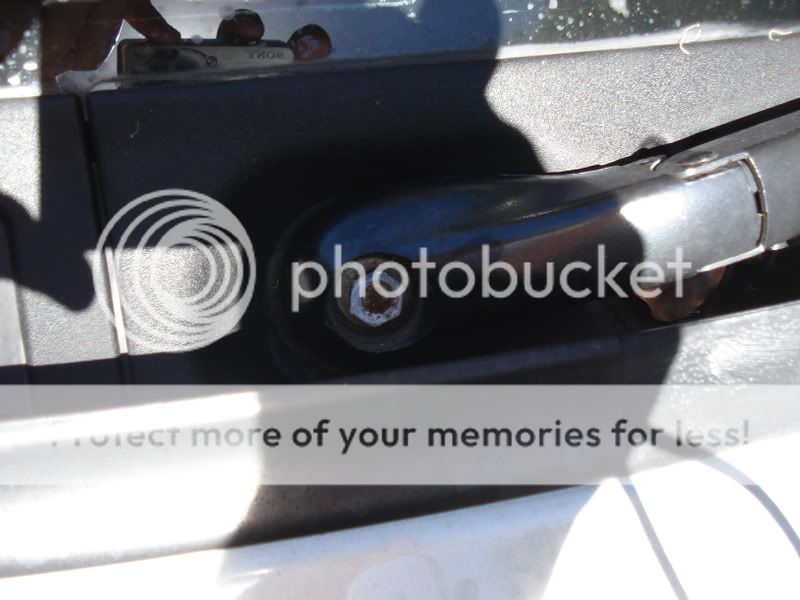 3. Open the bonnet. 4. Remove the rubber that sits on top of the firewall. Like the other rubbers it slides right off. The rubber is does have a left and right side as it is not symmetrical. 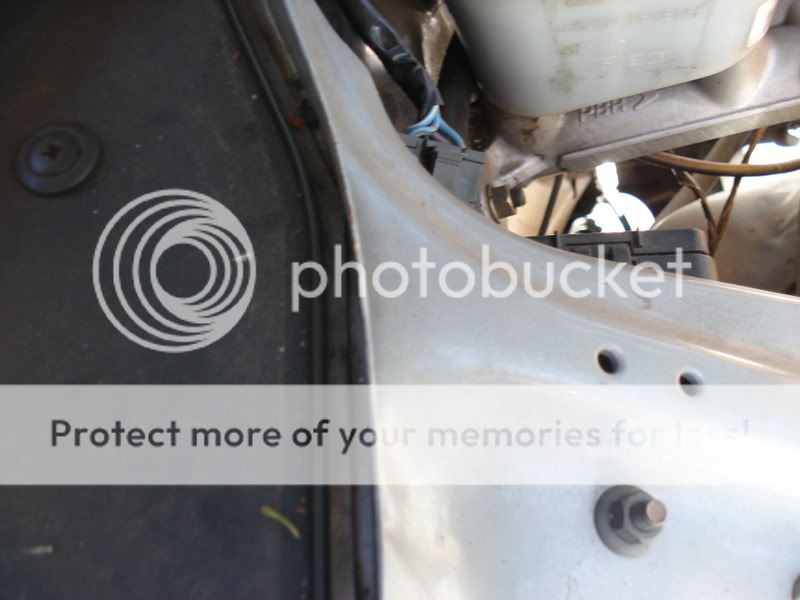 5. Next is to remove the trim plugs holding the cowling down. Just work through them. Being that they probably never been undone, they should come out with out needing to wrestle with them. 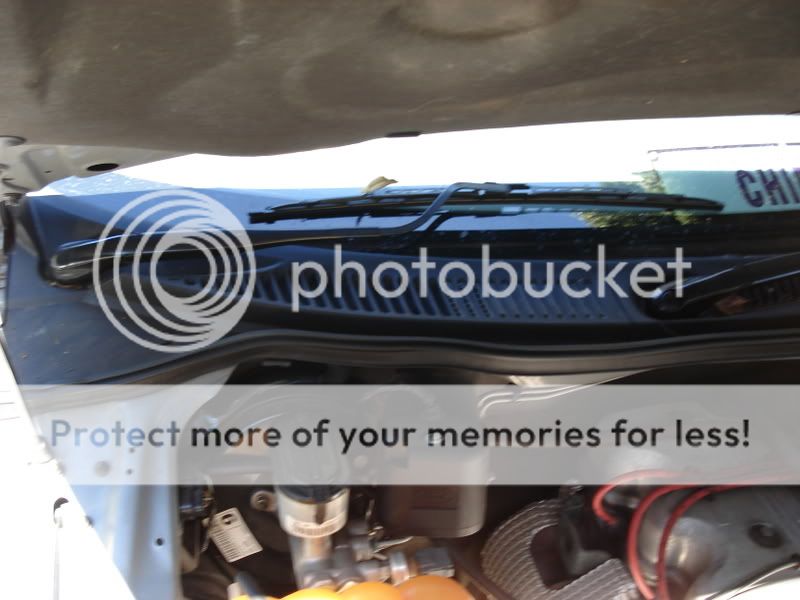 6. All that needs to happen is lift the cowling up and take it out. It may need to be wrestled with, just due its design it wants to snag itself on the bonnet. 7. Clean all the leaves, dirt and moisture. 8. Add a coat of wax for good measure. 9. Now that it is clean, time to put it back together. First place the cowling in its position. Then install the trim plugs and firewall rubber. 10. Close the bonnet. Time to do the wipers. Align the wipers with the markings you made. Then slide the base over the splined bolt. Check to see if it is aligned. Tighten the nut tight (I do not have the correct torque setting), don't forget the washer. Click the plastic covers in place. 11. Remove the tape from the windscreen and test wipers. The other rubbers are attached in the same principal. Be it just sliding on or off, with little T clips or sitting in a channel. I would recommend doing the other rubbers as well.
__________________
Albert Einstein: Es ist schwieriger, eine vorgefaßte Meinung zu zertrümmern als ein Atom. (It is more difficult to alter a preconception than split an atom) Falcon Tickford FPV (FTF) Car Club of NSW Fords in the Park 2010 I use and recommend Stingray Car Security. http://www.stingraycar.com.au/ |
||

|

|
| This user likes this post: |


 Threaded Mode